


Welcome!
Loving the fast pace of our spring activities!
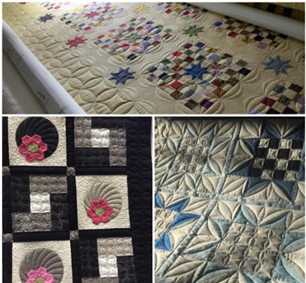
Were you able to attend either the Mukwonago or Oshkosh quilt shows this past weekend? If so, I hope you stopped by and said hi! If you couldn’t attend the shows, please check out some of beautiful quilts posted on my YouTube Angie's Answers.
You know what all those beautiful quilts have in common? Carefully cut and pieced quilt tops! While the artistic talents of the participating quilters are undeniable, so is their precision. And that’s the topic we’re going to explore today.
Last post I started looking at the anatomy of a quilt by sharing thoughts on quilt top fabric choice and preparation. Now that you have your fabric ready to go, let’s look at how planning, cutting, piecing and a little final preparation of your top lends to successful longarm quilting.
Planning
Okay, I know you already did a lot of planning to get to this point in making your quilt top … choosing a pattern, selecting your fabric and confirming how much you needed, preparing your fabric … now it’s time to jump in, right?!
Almost! To increase your chances of success … and enjoyment … make sure you’re truly ready to start cutting and piecing.
Consider:
Rereading your pattern carefully.
Make sure you understand the pattern designer’s instructions and methodology. If you decide to do things differently, double check yourself to make sure your changes mesh with the overall plan. You also want to reread to avoid any mistakes in cutting and piecing!
Assembling all the tools you’ll need.
Have everything you’ll need for cutting and piecing at hand. Go even a step further. Is your workspace free of clutter? There’s your rotary cutter … does the blade need replacing? Is your sewing machine ready … does it need a new needle or a different foot?
Pressing your fabric.
Pressing your quilt top fabrics before cutting will help with your piecing accuracy. This applies to wrinkled precuts as well as yardage. But a quick warning! Be careful when you’re pressing not to stretch or distort any of your fabric.
Planning complete! Next?
Cutting
Remember the old adage, measure twice; cut once? It still holds true! Take your time!
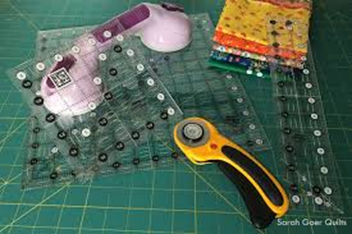
Consider these tips as well:
When cutting strips from folded fabric, make sure you’re starting with a true, straight 90⁰ cut. Nothing worse than opening your strip and finding it’s not straight!
After cutting five or six strips, check to make sure you still have a straight 90⁰ edge. Each time you make a cut, either your ruler or the fabric can move a little. After a few strips, the shifting can impact the accuracy of your cuts.
If cutting several strips of the same width, mark the measurement on your ruler to make your cutting easier and more efficient. You won’t be searching for the ‘right’ line on the ruler every time you cut.
If you find your ruler’s slipping easily when cutting, check where you’re placing your fingers. Make sure you’re using your fingertips and not the palm of your hand. Place one or two fingers off the ruler for stability. When cutting longer strips, move your hand up the ruler as you cut to maintain even pressure and control. You may find using ruler grips helpful as well.
When cutting fabric pieces by hand that will be appliqued to your quilt top, use very sharp scissors and move your fabric, not the scissors. Sharp scissors will help prevent frayed edges. Moving your fabric will result in a smoother cut.
Accurate cutting can take your piecing to the next level!
And speaking of piecing … are you ready?
Piecing
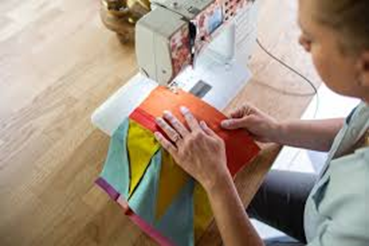
Let’s consider some tips that will result in a beautiful, precisely assembled top that will longarm like a dream!
Sew using an accurate ¼” seam allowance. If you want all your pieces to fit together correctly, this is the number one rule to follow!
Make a test block. If you’re assembling several pieces into a block or learning a new technique, make a test block or two to anchor the process and confirm your accuracy. This can save you from having to deal with major challenges when it’s time for final assembly of your quilt top!
Stabilize delicate or stretchy fabrics. This helps prevent puckering and distortion of your fabric. It will also give you a more structurally sound quilt top.
Iron your seams. Pressing your seams in place, whether open or to one side, will give you a flatter surface.
Nest your seams when possible. Pressing your seams in opposite directions and then aligning the seam allowances so they butt up against each other creates a “lock” that results in a flat, precise seam.
Measure blocks and sections of your quilt as you sew. As you complete components of your quilt top, measure them to make sure they’re the correct size and will fit together as expected.
Trim edges. As you’re handling your fabric and assembling pieces, some fraying may occur. If that’s the case, trim the edges so dark threads won’t show through lighter fabric when quilted.
Pin for precision. Especially when piecing longer strips of fabric, pin your fabrics together! Match outer edges and the center. Continue breaking the seam down into smaller sections so you can manipulate the fabric if needed. Result? Everything fits properly to size and lays flat!
NOTE: This especially applies to your border fabric! Measure across each edge and the center of your quilt. Take an average of the three measurements and cut/piece your border strip accordingly. Then pin it in place as noted above. No excess fabric and wavy borders to quilt!
Your quilt top is complete … precisely pieced and square! I know, it’s not really that quick and easy. Invariably, the seam ripper will be needed. But that’s okay! Temper your urge for 100% perfection but take pride in your work and its result. It really is about enjoying the process!
But wait … we’re not quite through.
Final Preparation
Before signing off that your quilt top’s complete, consider these final tips:
Give your quilt top a final press. Make sure everything is flat and secure. Check for any open or twisted seams. You want the longarm to be able to glide easily over the top!

Check the backside. Remove any loose threads that may show through the top fabric when quilted.
Stay stitch the outer edge of your quilt top. Especially if you have a top with pieced edges or biased cut edges, give your quilt a “victory lap” to hold everything together and prevent any distortion. Stitching 1/8 inch from the edge all around the quilt provides the protection your quilt top deserves. And it will be hidden by your binding.
DONE! Now you can move on to preparing your backing fabric and deciding on which type of batting you’d like to use. But we’ll cover those topics in the next few posts.
Additional Resources
Here are a couple of fun resources you might want to watch while you’re still thinking about your quilt top.
If you’d like more information on seams, using steam vs starch when pressing, handling dark vs light fabrics, stay stitching and washing your quilt top, check out the first nine minutes or so of this Handi Quilter YouTube video:
Prepping your quilt for longarm quilting – Watch & Learn Quilting Show Episode 20 (2-1-2021)
And even though this post focuses on accuracy and precision, if you have the need to create a fun and easy strip quilt right on your longarm, check out this 24 minute Handi Quilter YouTube video:
Speed-Quilting and Strip-Piecing on a Longarm Machine – Watch and Learn (12-7-2020)
Time to wrap up again! I’ll close with the latest on our upcoming classes, events and sales!
Upcoming Classes
Ruler and Gridwork Class with Wendy Fuller
Ruler and Gridwork Class (Appleton)
Friday, April 11, 2025
SOLD OUT – JOIN THE WAIT LIST
9:00 AM – 4:00 PM (Lunch provided)
or
Ruler and Gridwork Class (Elkhorn)
Saturday, April 12, 2025
SOLD OUT – JOIN THE WAIT LIST
9:00 AM – 4:00 PM (Lunch provided)
These are small group, hands-on classes!
There are so many ways to use rulers!! Wendy will show you tips and tricks for using rulers safely and effectively on your longarm to create straight lines, curves, circles, and arcs/swags.
Gridwork is when you quilt a grid-based design that can use stencils/marking or piecing lines to guide your quilting.
You'll get plenty of time on the longarms and go home with your practice piece!
**********************************************************************
Quilt Path and Quilter’s Creative Touch Classes
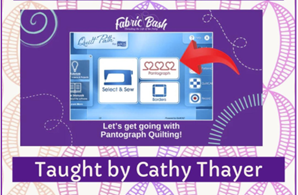
Quilt Path & Quilter’s Creative Touch (Appleton)
Friday, May 9, 2025
9:00 AM – 4:00 PM
or
Quilt Path & Quilter’s Creative Touch (Elkhorn)
Saturday, May 10, 2025
9:00 AM – 4:00 PM
If you have the APQS Quilt Path computer system, this is the class for you!
Take your expertise with Quilt Path and Quilter’s Creative Touch Version 5 Pantograph to the next level!
You’ll learn about Batch Import, the Power Pantograph application, basic and advanced pantograph tools and how to use the eclipse plug-in.
**********************************************************************
Demo and Workshop with Sue Heinz (Appleton)
90-Minute Demo: You’ve Got a Friend Named Elmer
Friday, May 16, 2025
5:00 – 6:30 PM
Imagine a world where every seam you stitch is perfect … every block true to size!
Imagine never having to rip again!
Sue guarantees you will achieve your wildest piecing dreams when you use this simple technique that requires no pins, clips or gadgets!
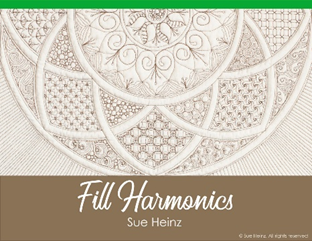
Day 1: Fill Harmonics
Saturday, May 17, 2025
9:30 AM – 4:30 PM
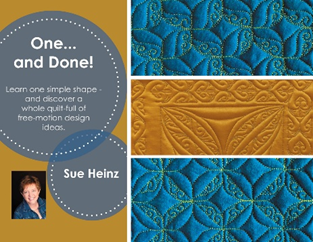
Day 2: One … and Done!
Sunday, May 18, 2025
9:30 AM – 4:30 PM
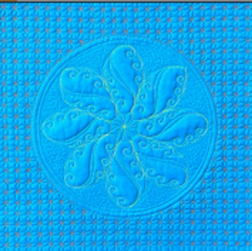
In Fill Harmonics, you’ll learn to create a symphony of background designs that harmonize well together on any quilt.
You’ll learn how to draw an array of Sue’s unique free motion and grid pattern backgrounds.
One … and Done will give you a new approach to custom quilting design. Sue will share her secret of using just one shape to fill an entire quilt with a variety of unique and harmonious blocks, borders, grids and designs.
Simple shapes, stunning results … and easy to master!
Click the links found above for even more information on these fantastic opportunities!
Upcoming Events
More road trips on this spring’s calendar!

Admission: Adults $6
Kids 16 and under – Free
**********************************************************************
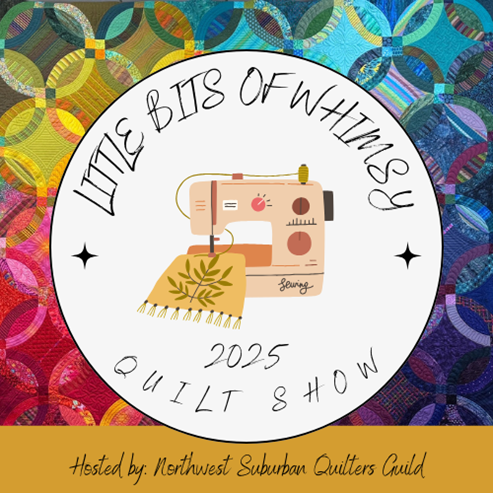
Northwest Suburban Quilters Guild – 2025 Show
Saturday, May 17, 2025
9:00 AM – 6:00 PM
Sunday, May 18, 2025
10:00 AM – 4:00 PM
Judson University
Lindner Fitness Center
1151 N State Street
Elgin, IL 60123
Admission: $8 per person, children 12 and under – free
Please join us! Stop by and say hi!
NOTE: Due to staffing these shows and pulling inventory from our shops, the Appleton store will be closed on
Friday, April 4th.
Sorry for any inconvenience this may cause!
Sales! Sales! Sales!
Check out Handi Quilter’s April/May sales!
First …

And then …

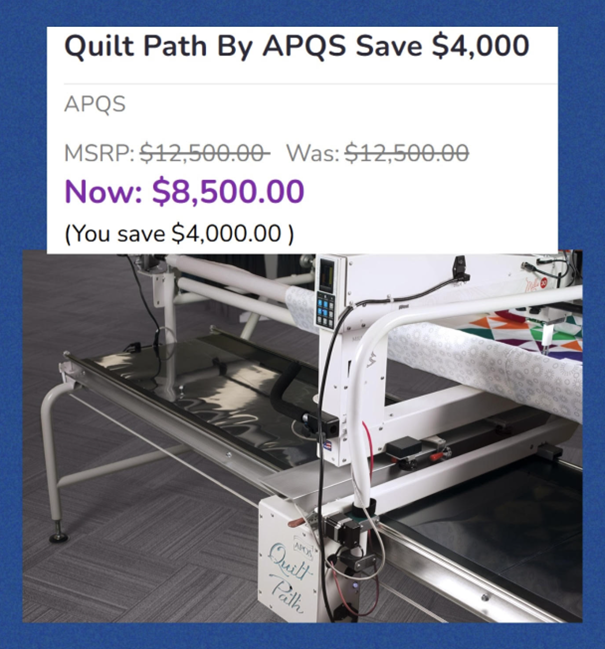
And from APQS …
Please contact us for more details!
That’s everything for now!
Please remember, if you ever have ANY questions or want additional information about ANY of the products and services we offer, please call us at (262) 723-6775 or email us at info@QuiltingConnection.com.
You can also visit us online at QuiltingConnection.com or in person at 21 Adams Street in Elkhorn, WI (usually M-F 9-4, please call to confirm we’re open) or 1017 W. Northland in Appleton, WI (W, Th & F 10-4, S 10-3).
Finally, check out our blog at QuiltingConnection.com/blog and our Facebook posts.
And please share your thoughts and questions. I’d love to hear from you!
Angie